Products 製品情報

Overview
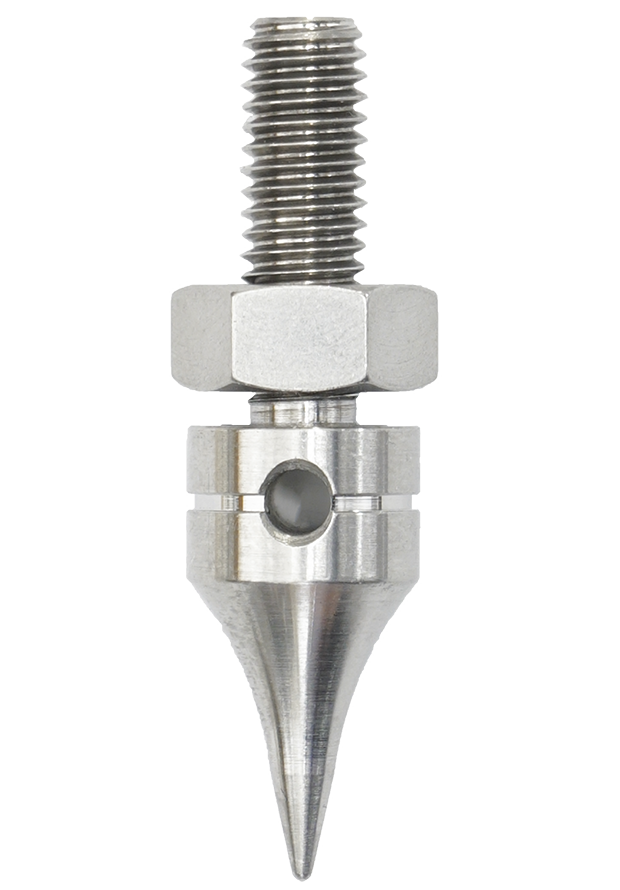
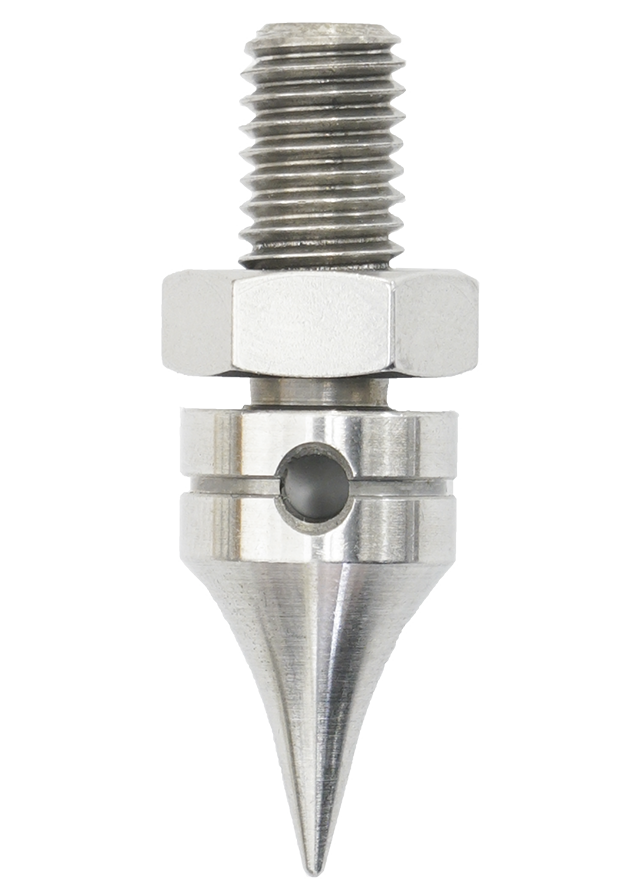
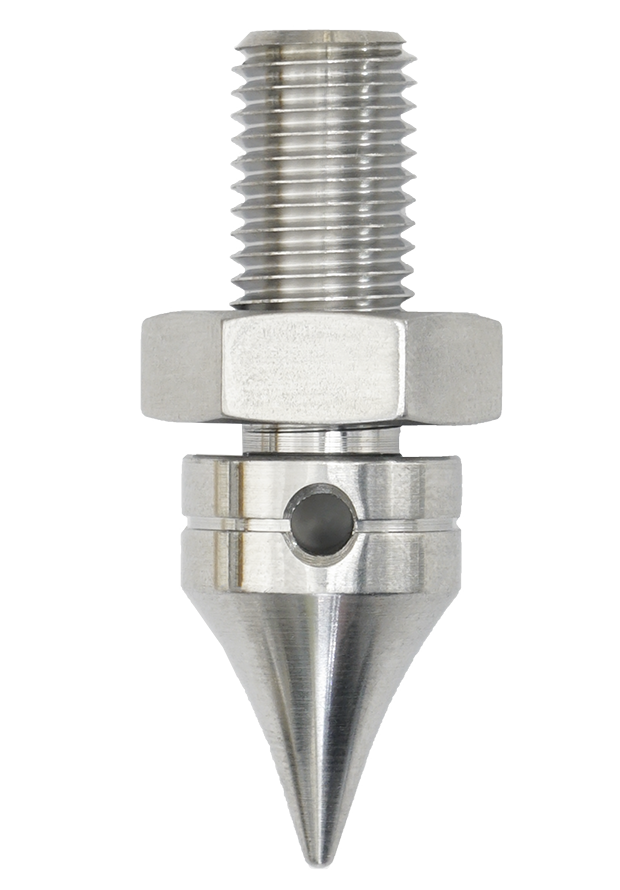
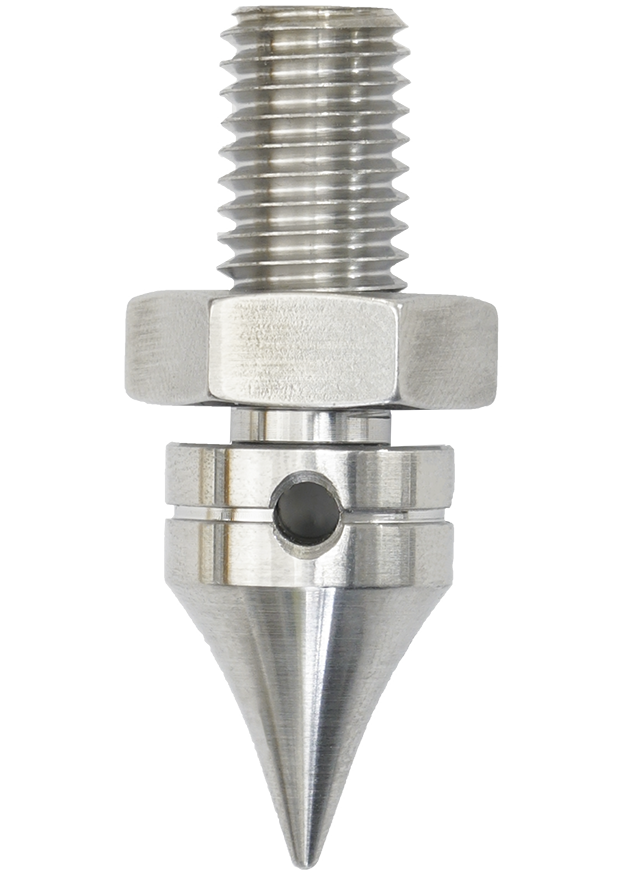
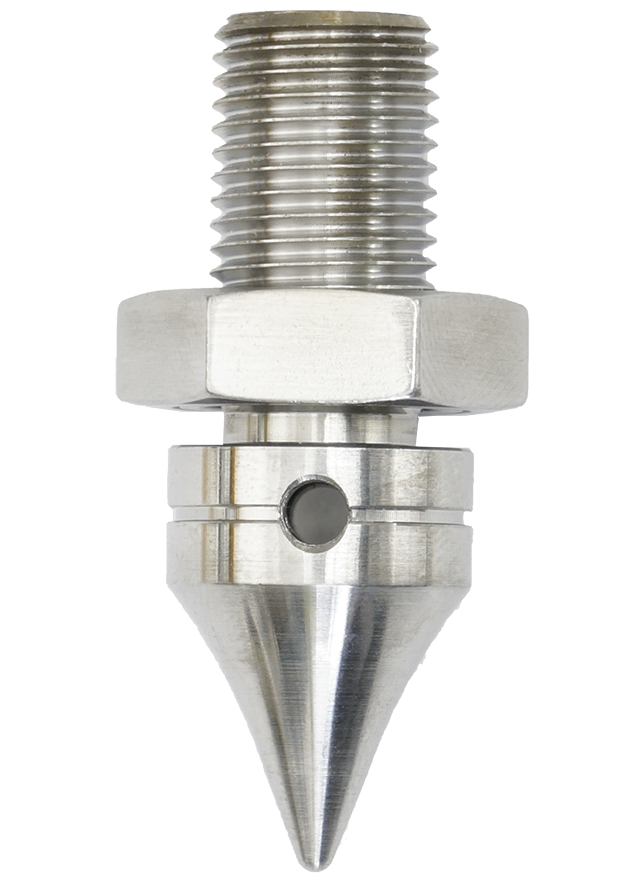
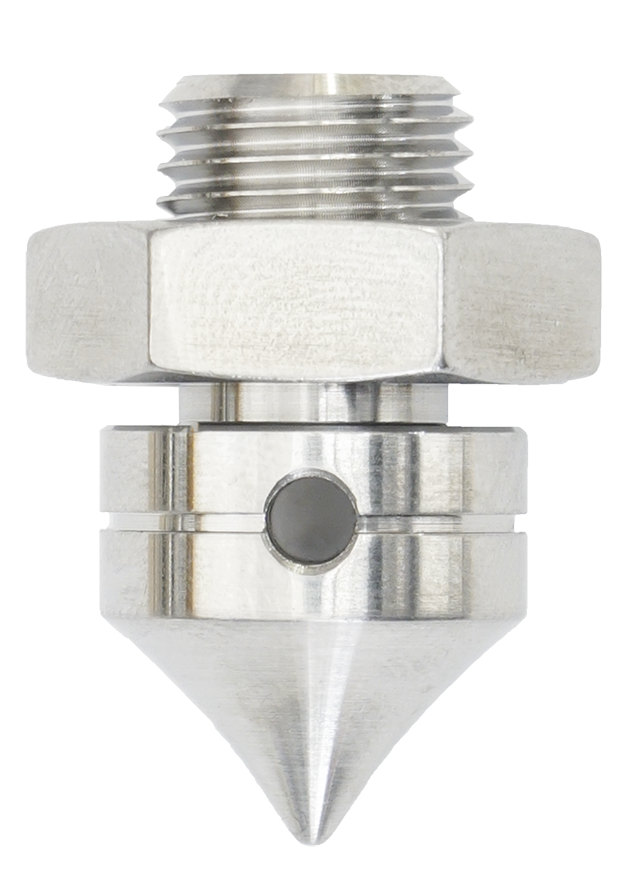
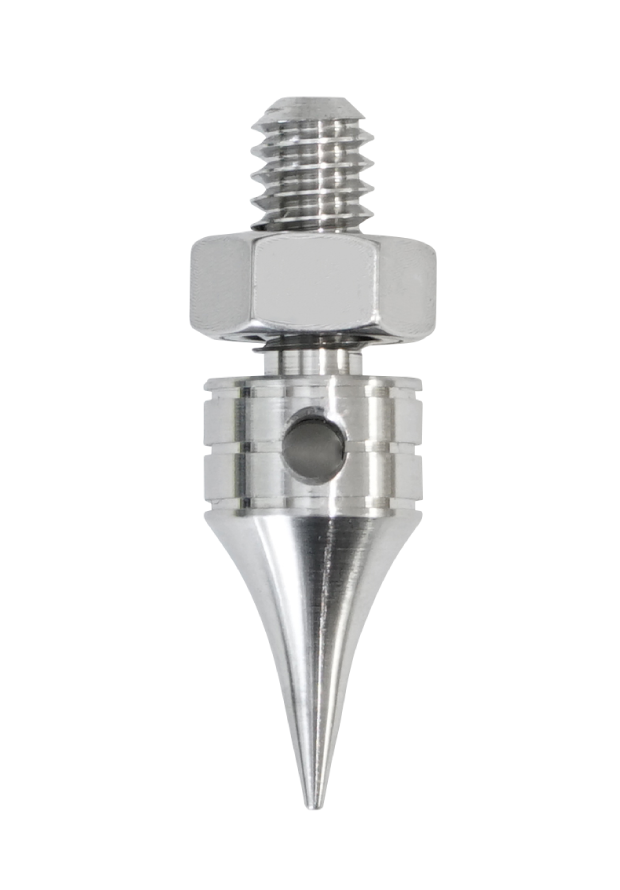
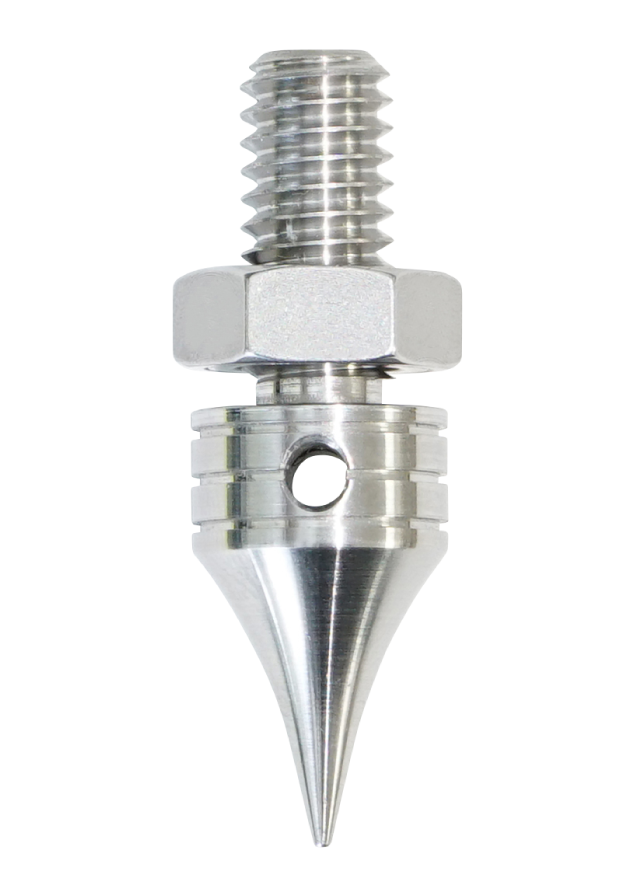
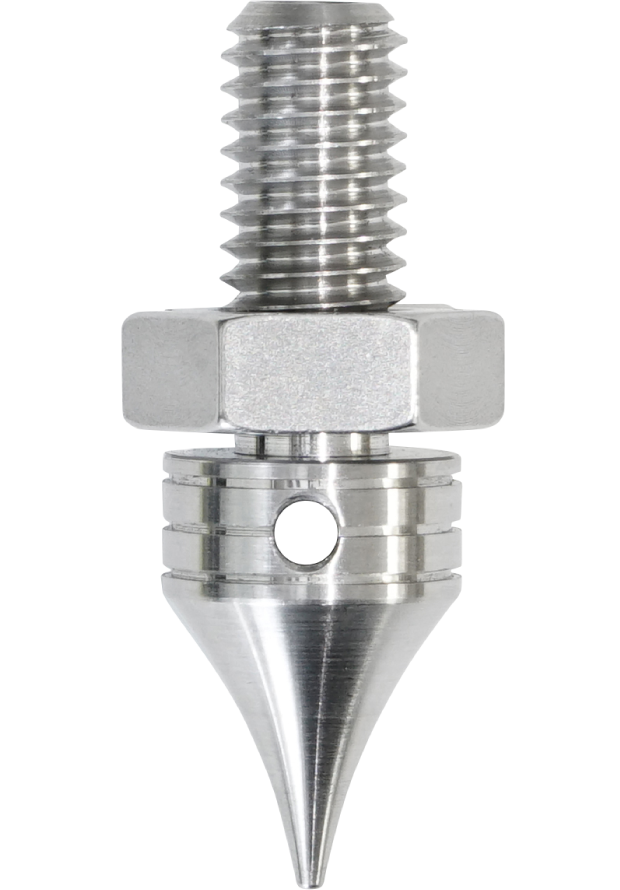
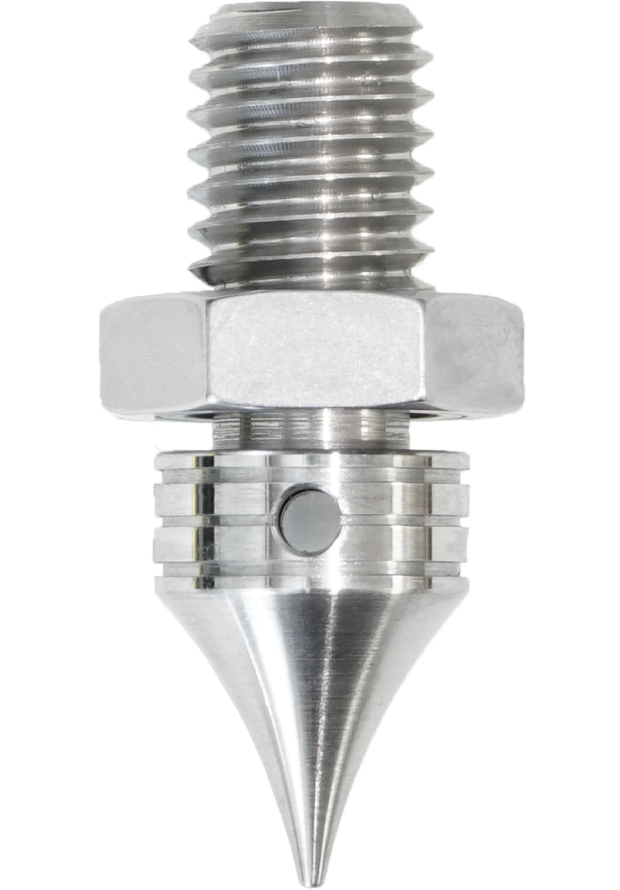
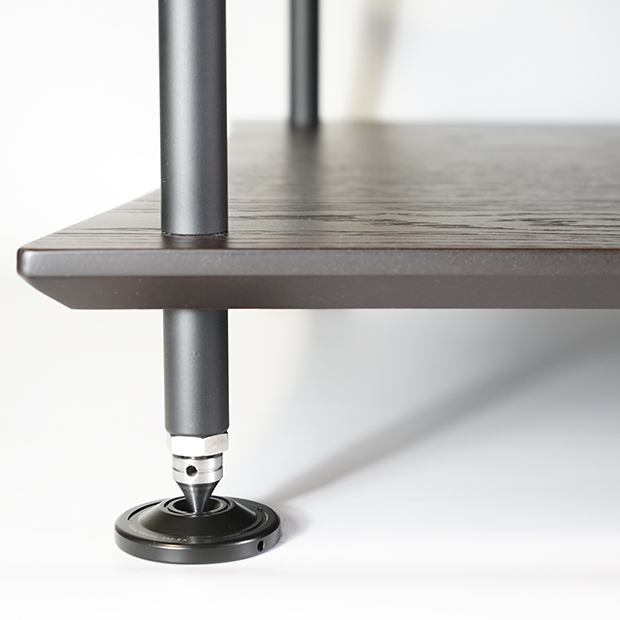
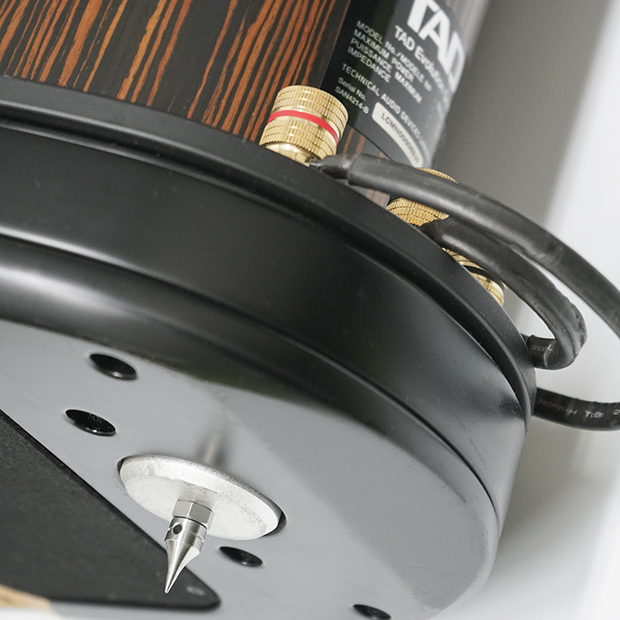
The design of this series of spikes is the result of 15 Years of development. We have reviewed every aspect of the design from choice of materials; shape of the spike itself; ease of adjustment and final locking. We have used these spikes on our own equipment racks as well supplying them separately to clients looking to improve the performance of their racks or speaker stands.
Many easily (finger) adjusted spike designs compromise the final rigidity of the rack or speakers. Unfortunately this does limit the final musical performance of the equipment using these spike systems.

Our kits come supplied with a “Tommy bar” that makes height adjustment easy (even when the spikes are supporting heavier systems). Our machined Stainless Steel locking nuts (not inaccurate pressed nuts) ensure mechanically rigid locking is achieved after your adjustment is complete. This ensures the optimum performance of the spike’s internal resonance control structure. Rotation of the spike during locking is easily prevented by using the supplied “Tommy Bar”.
No detail has been spared The hardness of the stainless steel has been selected following extensive listening tests.
This attention to detail and structural design; we believe has resulted in a performance level that is hard to match.
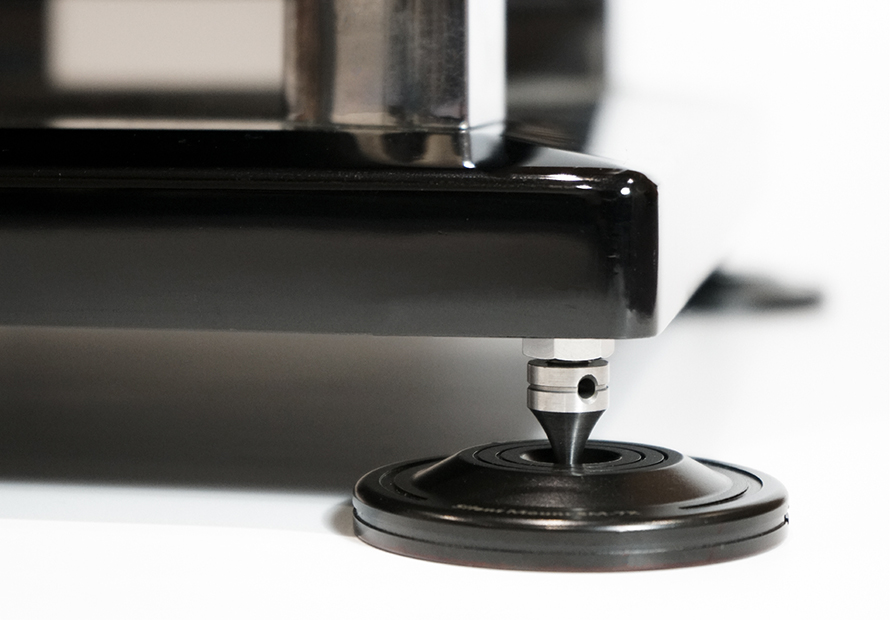
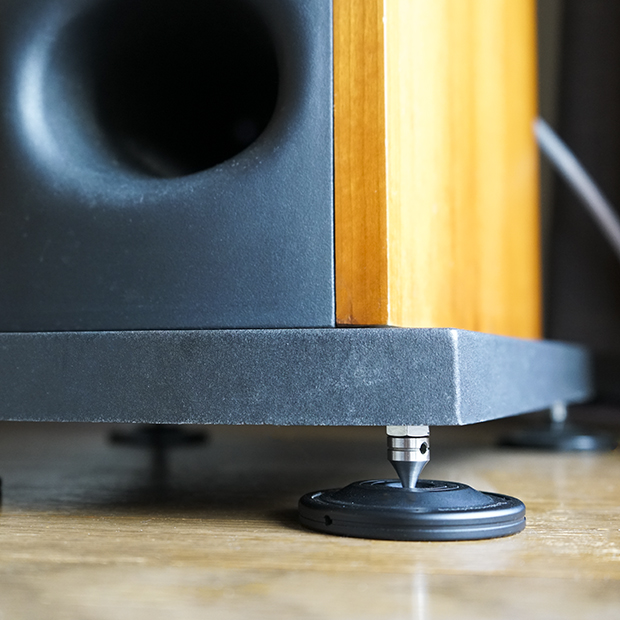
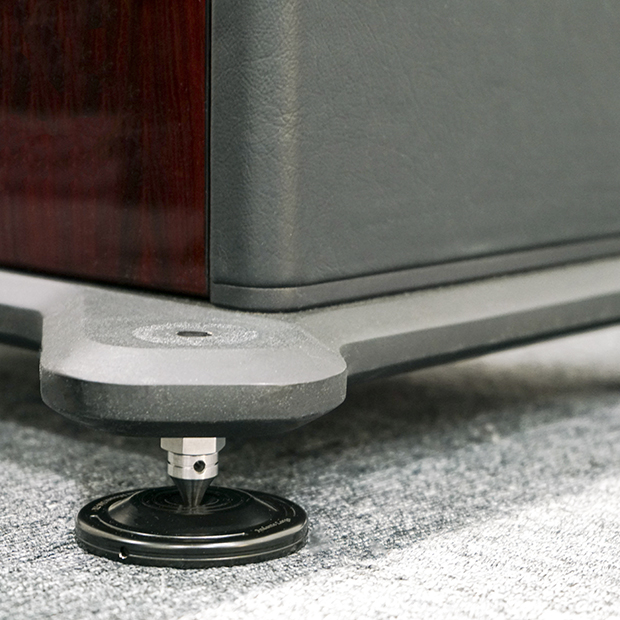
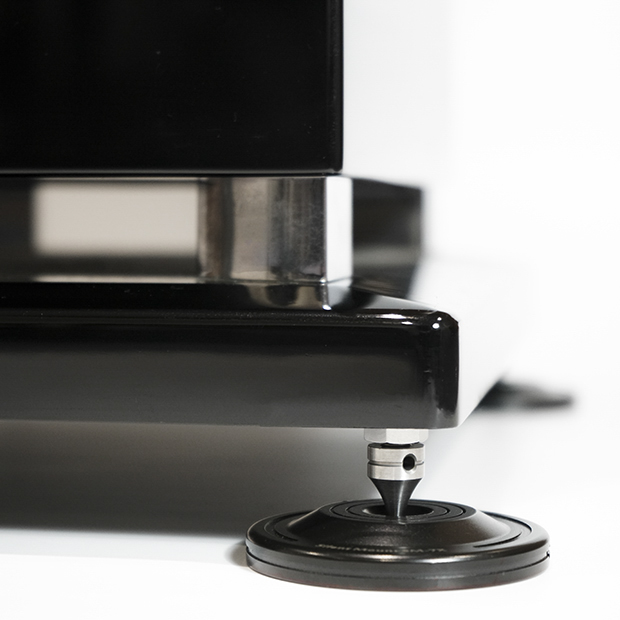
These spikes when used in conjunction with our silent mount support systems give exceptional equipment and speaker support.
OPTIONS
- Set of 4 with “Tommy Bar” and spanner
- Made in Japan
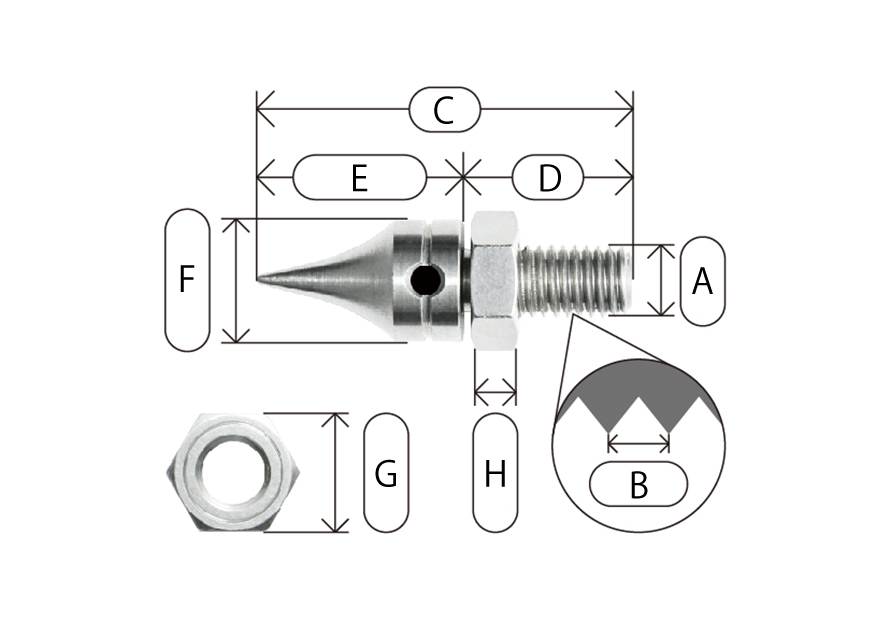
mm
| Type | TS-M6 | TS-M8 | TS-M10 | TS-M10-Q | TS-M12 | TS-M12-J |
 |  |  |  |  |  |
inch
| Type | TS-1/4 | TS-5/16 | TS-3/8 | TS-1/2 |
| |  |  |  |  |
Size
mm
| Model | A | B | C | D | E | F | G | H | W |
| M6 | 6 | 1.0 | 36 | 14 | 22 | 11 | 11 | 5 | 50 |
| M8 | 8 | 1.25 | 40 | 18 | 22 | 13 | 13 | 5 | 50 |
| M10 | 10 | 1.25 | 44 | 22 | 22 | 15 | 17 | 6 | 80 |
| M10-Q | 10 | 1.5 | 44 | 22 | 22 | 15 | 17 | 6 | 80 |
| M12 | 12 | 1.25 | 44 | 22 | 22 | 16 | 19 | 6 | 80 |
| M12-J | 12 | 1.25 | 29 | 13 | 16 | 16 | 19 | 6 | 80 |
inch
A : inch / B-H : mm / W : kg
| Model | A | B | C | D | E | F | G | H | W |
| 1/4 | 1/4” | 1.27 | 36 | 14 | 22 | 11 | 11 | 5 | 50 |
| 5/16 | 5/16” | 1.41 | 40 | 18 | 22 | 13 | 13 | 5 | 50 |
| 3/8 | 3/8” | 1.59 | 44.5 | 22.5 | 22 | 15 | 17 | 6 | 80 |
| 1/2 | 1/2” | 1.81 | 44.5 | 22.5 | 22 | 16 | 19 | 6 | 80 |
Installation
Detailed installation and adjustment methods are introduced in the instruction manual.
1. Initial fixing
Make sure the locking nut is fully down the threaded shaft of the spike. Wind all the spikes fully down into their threaded holes. For equipment racks check the level of the rack or speaker. Front and back as well as left right.
Adjust the spikes to level the equipment and minimise any rocking by fine tuning (it is generally good practice to try to keep the spikes as far in their mounting holes as possible when achieving this.

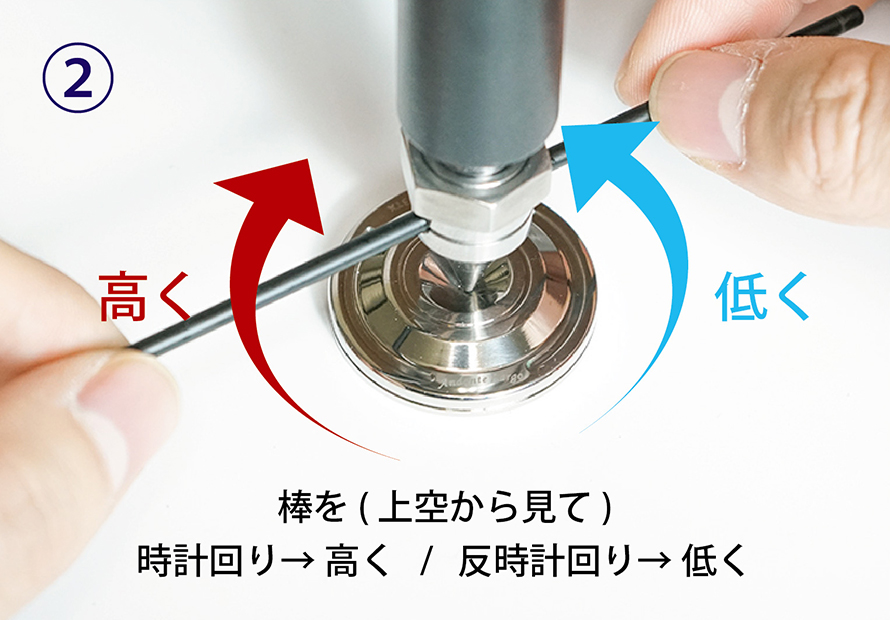
2. Adjustment
Insert the included tool into the hole on the side and turn the spike to adjust the height.
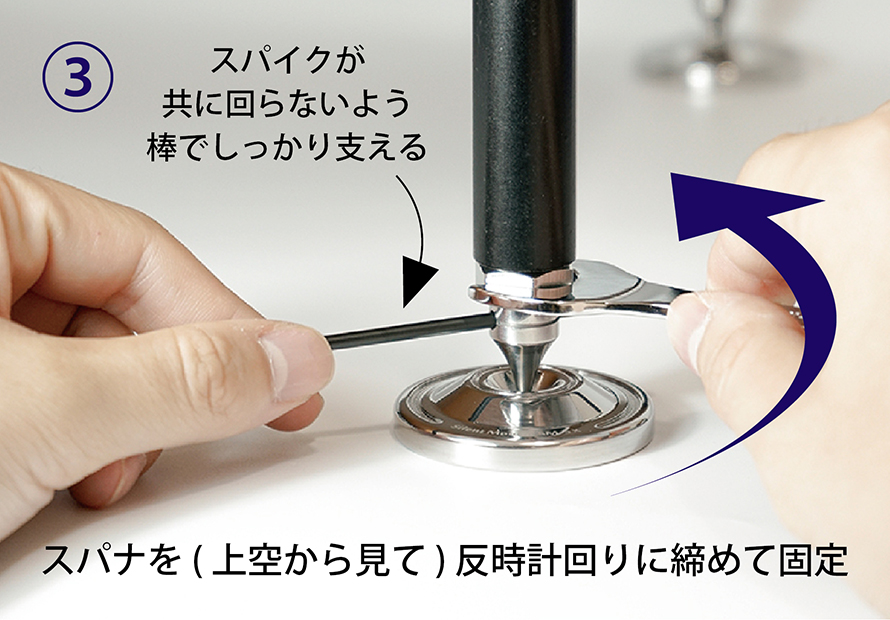
3. Locking the Spikes
Lock down the two back spikes BUT only one of the front spikes. Use the “Tommy bar” to stop the spike from turning while you tighten the machined nut with the spanner provided. (Please be careful not to apply excessive force when tightening as this may cause damage.)
4. Final confirmation and locking
Recheck that the equipment is level and rigid. If there is some small movement carefully adjust the last spike to minimise this movement. When you are satisfied tighten the last spike ( make sure you use the Tommy Bar to prevent any movement )
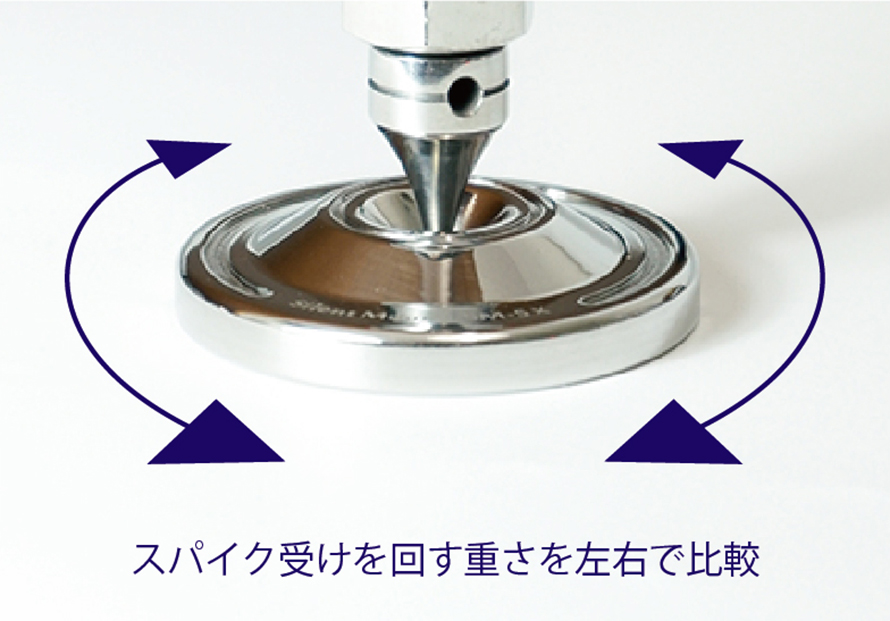
TIP-1
If you are using a spike receiver such as our silent mount, before doing the last spike adjustment make sure that all the spikes are sitting centrally and fully located.
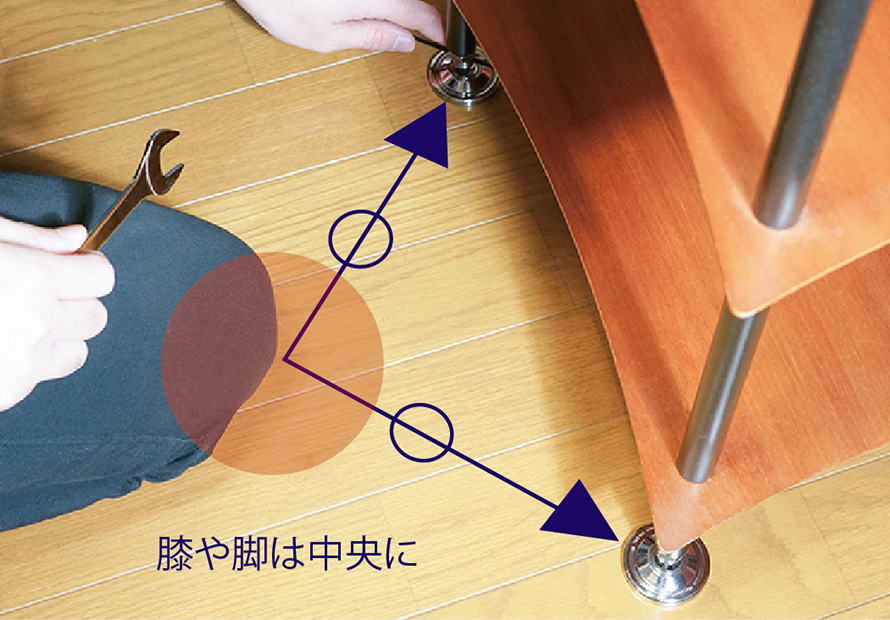
TIP-2
On looser wooden flooring when testing the final rigidity stand as far away from the structure lean forward and check rigidity. If you are standing close to the unit your weight may be distorting the floor and giving you a false impression.
Reference photo

Contact
English available. Please feel free to contact us.

ニュースNews
- 2026.04.07
- メディア掲載
- Vega 電源ケーブル@analog誌91号
- 2026.03.06
- プレスリリース
- 新製品のお知らせ「Chord Company Vega Power Cable」
- 2025.12.26
- お知らせ
- 2025-2026 年末年始休業
- 2025.11.07
- メディア掲載
- 「EE1 Plus」アクセサリー銘機賞2026 グランプリ受賞
- 2025.08.21
- お知らせ
- 一部USBケーブルの、長さラインナップ変更のお知らせ